Some thoughts on greenhouse heating and insulation
With energy costs rising around the world, many growers both amateurs and trade are seriously looking at their operations and considering changes – which in some cases may result in stopping growing warmer orchids. It is a great shame to see that happen, and there are some steps that can be taken to try and help out for existing greenhouse users.
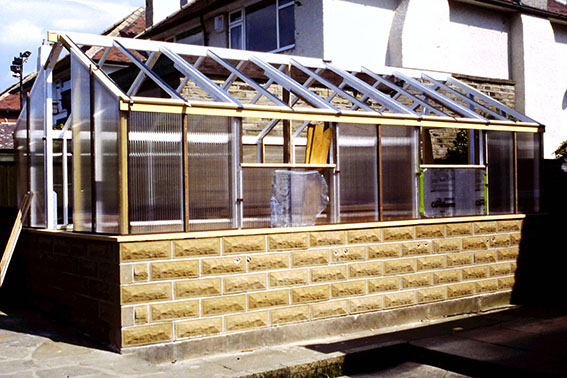
During 2022 I have erected a new greenhouse, which has been 18 months in the making. When we moved to our latest (and last) house there was only a 6’ x6’ greenhouse, and the first thing I did was to get a large conservatory built. This is about 30’ by 10’, and the intention was to use half for orchids (the warmer growing vandas, Cattleyas etc.), and the remainder as a conservatory. A larger greenhouse of 8’x12’ went up outside to replace the smaller one, and this has been used for the intermediate and cooler orchids (Paphs, Phrags etc)
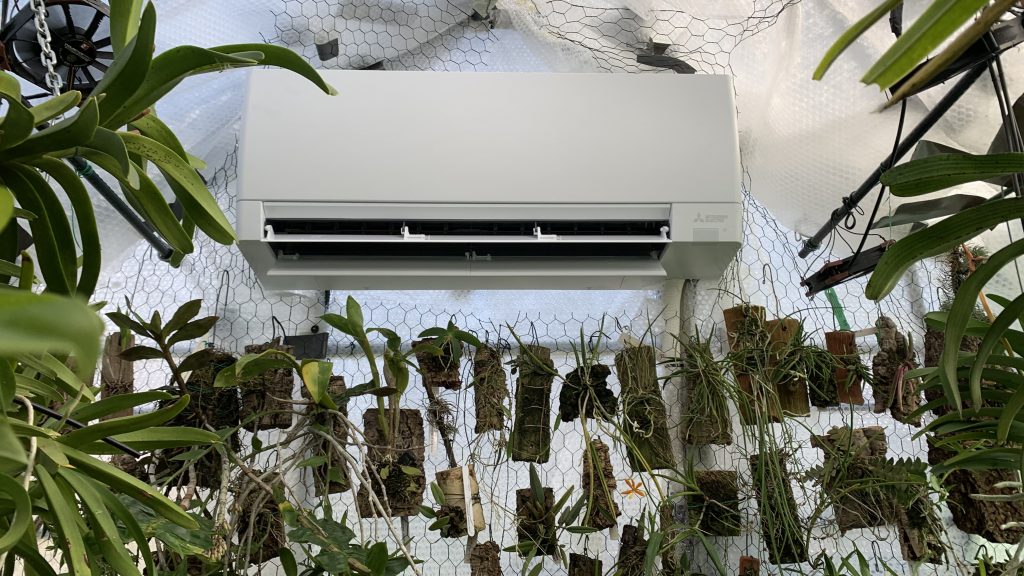
As time has gone on, these conservatory orchids haven’t grown as well as I would have liked. The temperature has been fine with relatively minimal heating. Initially the tap water wasn’t so good, and I had to switch to rainwater, but still no joy. After getting a hydrofogger into the greenhouse and seeing the benefits of increased humidity I came to realise that this was likely to be the issue. I also have concerns about the amount of plastic and whether it gives off gas, but I think this has just been a distraction. I can’t really put a fogger in the conservatory as I get nagged enough about the condensation in winter! When I was asked a couple of years ago whether I could move the plants out of the conservatory it seemed as if it could end up being a blessing in disguise. Of course, that was well before energy costs went up!
Selecting a greenhouse
Having had a variety of greenhouses and growing environments I would like to think that I have some useful experience. This has included growing under lights in both a stable and a garage. Two of the greenhouses were home designed and built, and these were probably the best 2 I have had. During my 30 years of growing orchids, I have formulated an idea of what I think is the perfect greenhouse which would probably be very expensive given that I would need a builder to construct it. Balanced against how much longer I hope to have to still grow and enjoy the plants then this option isn’t really workable.
This leaves a mild form of custom-built greenhouse, or a standard garden glasshouse with some insulation. I started by googling double glazed greenhouses and was surprised by finding a company that produced them. They weren’t cheap as they were more or less a freestanding conservatory. It would provide decent insulation with lower heating costs, but not something that I could erect myself. The idea of a great white plastic structure didn’t feel right either, but I was heartened that the idea of a double-glazed greenhouse had finally been produced.
All the other greenhouses on the market are simply 4mm glass or 4mm polycarbonate. None of these are designed for a warmer environment. I really don’t understand why the manufacturers can’t reduce the size of the clips and allow for thicker polycarbonate sheeting. Some greenhouses come with dwarf walls – which add to the cost without adding any benefits to a heated greenhouse. Some greenhouses have a modest wall, which is better for insulation, but these then tend to use small panes of glass for the glazing. They use wood though which can be customised for polycarbonate but would be narrow and a lot of work on top of the expense to start with. From a pure cost view, in the end a standard aluminium glasshouse seemed the best bet but would need insulation. As this was pre-energy rises, it was the route that I chose.
Heating options
There are more heating options and techniques than may at first be thought.
Gas comes in options. It is possible depending on location of the greenhouse to use household central heating. This isn’t too good of an option as heat is needed overnight, and the house would be at a different temperature. Theoretically you could run 2 pumps from a single boiler. A better option would be to utilise a separate boiler within the greenhouse, with an external vent. A series of radiators can be utilised to create desired hot spots allowing for differing heat zones in the greenhouse. If your greenhouse is divided into different temperature zones then the same boiler will suffice for this. Different sized boilers are available on the market, and quite a ‘small‘ one will suffice for most amateur greenhouses. There are setting up costs, and then the cost of gas – sadly now that is an expensive option. Other types of gas – calor gas etc., could be used rather than mains, but again this is now very expensive. The best use of these in reality is as a backup heater in the event of a power cut. They would really need external venting, but it wouldn’t be a serious issue if used overnight in an emergency (1 night only).
Coal must be mentioned as this was what used to heat the Victorian stove houses. It is a expensive option these days, with pollution adding to its lack of appeal. A modern approach is to use renewable wood pellets, often used for office buildings. It isn’t that practical for residential properties as supplies tend to arrive in large articulated wagons. It is an option for trade greenhouses, but off the cards for the average amateur.
I will mention solar panels, but not as a primary heat option. Most heat is required overnight when the sun doesn’t shine, and it doesn’t shine during rain or snowstorms. Batteries are available these days to store the generated electricity, which can then be used overnight. Alternatively the energy can be stored as hot water in the greenhouse to help both humidity and to slowly release a base level of heat. A variation of this would be to store heat in eg. Thermal bricks under benches. I remember the late Jimmy Grieves said he used to pump hot air from the top of his greenhouse into such a store. This idea isn’t too far fetched as modern household electric radiators tend to be clay filled to use off peak electricity and release heat thereafter. I haven’t looked into the costs of this type of heating as it isn’t an off the shelf type of option.
Whilst on renewables, small wind turbines can be used to generate energy if you have a site that would allow it. The main benefit is that this can produce power overnight, so storage isn’t required. Again, it can only be seen as a secondary option as wind isn’t guaranteed.
Both wind and solar in small scale are probably working at 12 volts (designed for camping and caravans), and not easily connected to the mains. We have already seen this type of power connected to ‘computer’ fans for circulation and to create humidity, so it is simply taking things one step further. It is possible that as energy becomes more expensive then manufacturers may develop 12V heat stores etc.
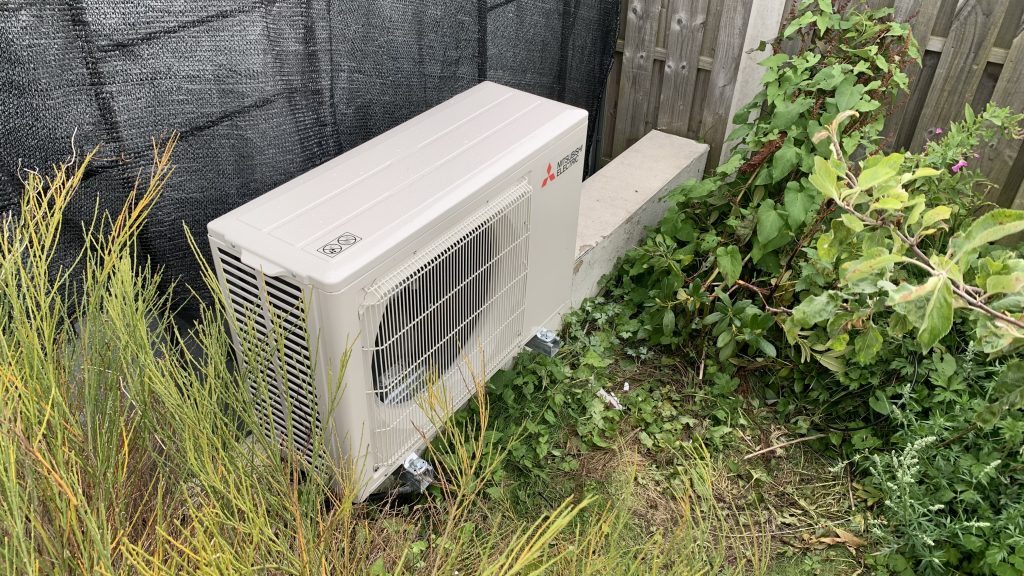
Heat pumps for both ground and air are becoming more popular for household heating, and are easily adaptable to greenhouse usage. If you have a large garden then ground source seems more cost effective, although installing a lot of large tubes will make a mess as well as be expensive to install. Once in I am told they are cheaper to run as they only need electricity to run the pump rather than create heat. I have to say that I don’t understand how heat exchange works. It is the same principle as fridges, and despite my advancing years I still don’t understand how they work either! Some orchid growers have already adopted this solution. It is also a workable solution for the trade.
Finally, we come to electricity. This has always been a cheap option, and easily used as it can just be cabled into the house. This is better as a dedicated feed from the power distribution box rather than using extension leads. I have a 32amp cable dug underground to feed both my greenhouses, and I need that much for heaters, fans, humidifiers, and of course a radio (for me rather than playing classical music to the slippers to make them grow). Electricity is no longer a cheap option. The governments hoped it would be a blip, and go back down again, which it might do to an extent, but I think it will remain over double what it was. The problem with electric generators is that they need to burn alternate energy sources, so are wasteful with energy from their source whether coal, gas, or oil. Renewables can’t supply it all, and we must wait years for nuclear to be installed, and many people are against this technology. In my own view, this is the only long term solution, and I’ll be long gone by the time we are all nuclear!
Electric heating for greenhouses doesn’t need too much explaining. Generally fan heaters are used in the main, but heating tubes and modern radiators can also be used. Where you place them is far more important in saving cost. Typically they have been placed on the floor, and consequently heated the whole of the greenhouse. A lot of space is wasted in a greenhouse, and under benches is a waste of energy, sadly we can’t do too much about the roof space with heat rising. Slightly off topic I remember once going to a church funeral and being told that they had installed a wonderful heating system that worked evenly from the floor upwards to 6 feet or so, trapping the cold air in the cavernous roof space, and just heating where it is needed. Is there anything from this that we can use in a greenhouse? With fans running and uneven heat creation points it would seem not, but if we could create a false ceiling then it would. This isn’t practical in a small greenhouse, but in medium and large greenhouses it should be possible to construct something cheaply from polythene/bubblewrap or a thin polycarbonate/acrylic sheet. Don’t waste energy where it isn’t needed, and this applies to all forms of heating.
As I had planned my greenhouse, and purchased it prior to the energy rises, then I was really left with electric heating. Part of my thought process was that I could build an expensive greenhouse with an expensive installation of a heat solution (ground heat pump would have been the likely solution), or I could buy a cheap greenhouse, insulate it well, and simply pay the extra electricity costs for several years until I am too old etc. (I’m not planning on giving up anytime soon!)
Insulation options
As I mentioned earlier you simply can’t buy a greenhouse suited for orchids at a decent price. I can’t see that changing anytime soon as probably 99% of greenhouses sold are unheated. The greenhouses that I would class as suitable are those with a brick wall, but even then they need to be insulated to retain heat.
Fixing insulation to aluminium greenhouses isn’t easy as they aren’t designed for it, so a perfect fit is an achievement. The easiest start is to fit some polystyrene foam sheets to the greenhouse walls under the benches. Ideally this would be about an inch thick (25mm). This won’t block out any light to the plants and is quite a cheap option. This sadly isn’t an option for above the bench and roof unless you plan on growing under lights for the cooler months (not a topic for this article).
Bubble wrap is commonly used for greenhouses and often comes about 2’ wide which is usually just about right for the glass width. Often it comes with plastic clips that will slot into the aluminium grooves. I find that they tend to fall out too easily which reduces their efficiency (good idea, poor implementation). Bubble wrap has 2 sides of course unless you buy the wider double sided version which is even harder to attach, and for the single sided version you should always put the bubble side against the glass. This creates another series of trapped bubbles. It isn’t a true double bubble, but it helps. If the flat side is against the glass then there is only a single layer of insulation. If you can get an even gap between the glass and the bubble wrap then an extra layer of trapped air will aid insulation, but it must be said that this is near impossible to achieve due to the flexibility. Bubble wrap is a cheap form of starter insulation, but won’t save serious money.
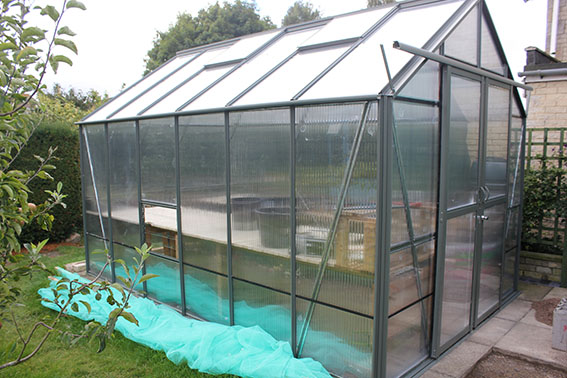
Multiwall Polycarbonate sheeting is a good option for insulation, and depending on the thickness used is relatively cheap. Standard thicknesses tend to be 10mm double wall, 16mm triple wall, and 25mm (1 inch) quad wall. I think you can get 32mm as well if you live in a seriously cold area. I settled on the 16mm triplewall, and this cost me about £1000 for cut to size for an 8 x 12’ greenhouse. I’m expecting that this will pay for itself within a couple of years.
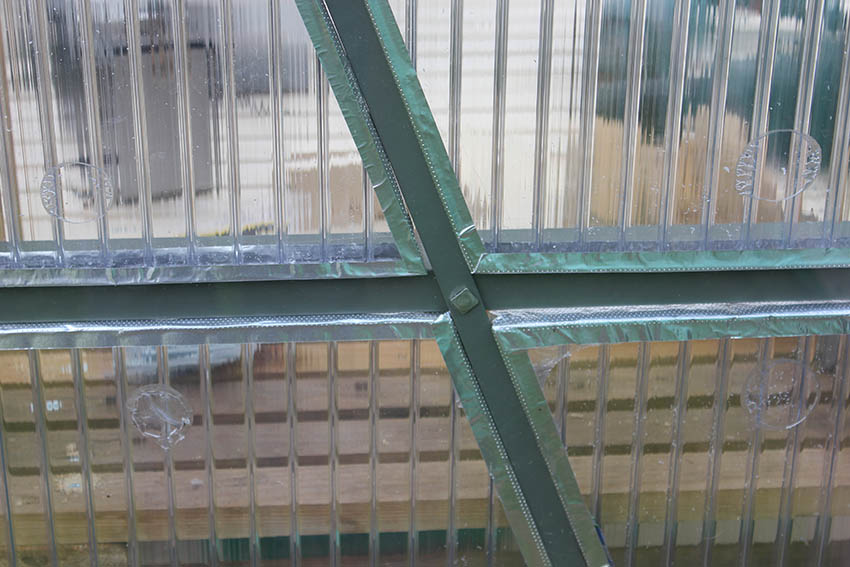
Fixing the sheeting takes some thinking about. I have glued mine to the glass sheets, hoping that there isn’t an issue with expansion/contraction. It was fixed when it was hot, so if it doesn’t get very cold inside the greenhouse then it should be OK. The other option is to attach it through the grooves in the aluminium. There aren’t bolts available to do this so you would need to buy some appropriate length bolts and hacksaw the sides off the head, and eventually fit a stretcher across the poly sheet to fasten into place. Gluing the sheets (a small dab in each corner) on as I have done ensures that there is a small gap of about 1mm between the glass and the sheet. This adds just a little bit more insulation making it 3 cells wide in total. The sheets I ordered were full length for where they would fit. Some of these then had to be cut to size to fit around the structures bracing as well as in and around the vents. This is quite an easy process that requires little more than a tape measure and a sharp fine toothed saw, and of course these all need to be taped up with the appropriate breathable tape. Not all fitted just as well as in the picture.
I can quantify the benefits of the polycarbonate once the weather started cooling in September. Both my greenhouses are next to each other, so get the same level of sun. The new one with polycarbonate insulation was about 3C warmer than the older greenhouse with a layer of bubble wrap. This is the difference between intermediate and warm, so I am hoping that the same amount of heat in both houses will produce the desired results.
I do of course plan to fit polycarbonate to the older greenhouse in 2023.
The optimum greenhouse
I started this article by saying that you would need to custom build the perfect greenhouse, without defining the details. I have seen several very good greenhouses such as those of Ian Dorman and Hilary Hobbs. These have a warm section in the middle, with intermediate and cool at each end. They have small brick walls with wooden tops. Wood is a much better insulator than aluminium.
One of my old greenhouses that I designed had a brick wall to 3 feet, and then an old wooden greenhouse was repurposed for the upper part The spars were spaced at just over 1m to fit the width of the polycarbonate sheet. This used just 10mm polycarbonate commonly available at the time. I would now go for 25mm polycarbonate fitted into a wooden frame. This would allow for a greenhouse as large as wanted, with differing temperature zones.
As a final thought this would be half buried with the walls underground. It wouldn’t be brick, more concrete, but would only work if on a slope for drainage.
Conclusions
There are lots of things that can be done to make an old greenhouse more efficient and cost effective. I don’t want to see any amateur orchid grower being priced out of their hobby – nor do I want to see it happen to the trade, although I understand that some dutch firms are struggling.
I am not an expert, but I hope there is something in this article that makes you think, and can put into use. John Gardner